Disclosure: この記事はアフィリエイトリンクが含まれている可能性があります。
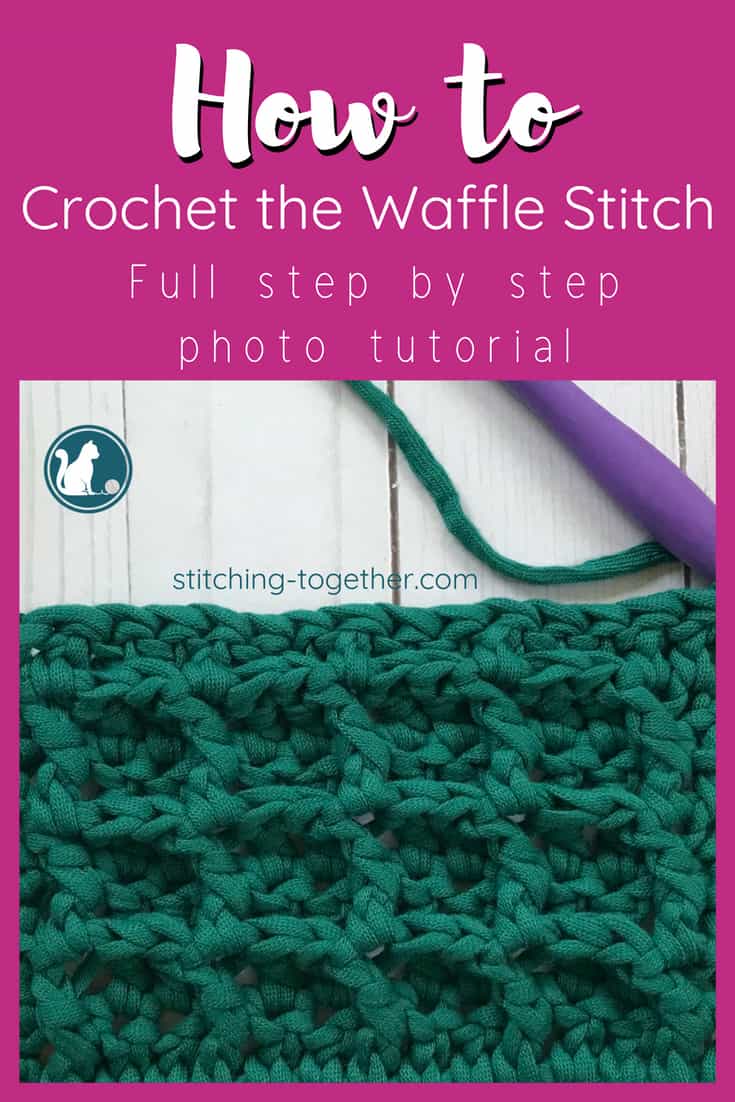
かぎ針編みで最も素晴らしいことの一つは、糸の玉から素晴らしいものを作る以外に、ステッチの組み合わせによって達成できる素晴らしいテクスチャです。
この楽しいステッチを編んだことがない方は、一緒に学びましょう。
ワッフルステッチをマスターするには、通常のダブルクロッシェ、フロントポストダブルクロッシェの方法だけでなく、チェーンとあなたの作品を回すの基本を知っておく必要があります。
それができたら、「かぎ針編みワッフルステッチふきん」のパターンを見て、ワッフルステッチを使って素敵なものを作りましょう!
その後、ワッフルステッチのブランケット、ワッフルステッチのスカーフ、ワッフルステッチのバッグなどのパターンを含む「ワッフルステッチ パターン ラウンドアップ」を必ずチェックしたいものです。 あなたは長い時間のために忙しくするのに十分なかぎ針編みのワッフルステッチのプロジェクトを見つけるでしょう。
あなたが以下のチュートリアルを通してあなたの方法を作業すると、最初に写真のない書面による指示である。
パターンを読むのに慣れている方は、ワッフルステッチについて書かれた説明より先を読む必要はないかもしれません。
書かれた説明の後、右利きの方のための写真のチュートリアルの始まりと、左利きの方のための写真のチュートリアルがあります。
写真の説明は、かぎ針編みのパターンを読むのが苦手な人のために、全文で書かれています。
各説明の最後には、かぎ針編みのパターンにあるような省略された説明も載せています。
最初の行の他に、新しい行を始めるために2チェーンするよう指示していることにお気づきでしょうか。 ほとんどのダブルクローシェの説明書では、行の始めに3つ鎖でつないでいます。
ターニングチェーンのポイントは、次の行を開始するのに十分な高さを与えることです。 私は小さめでタイトに編むことが多いので、2チェーンで十分です。 別のスワッチで実験して、最もきれいなエッジを与える方法を確認することができます。
Waffle Stitch Written Instructions
略語:
ch(s): chain(s)
dc(s): double crochet(s)
st(s): stitch(es)
fpdc(s): double crochet(s):
作り方
3+2の数だけ編みます
1行目:フックから4つのchと横の各stにdcし、ターンします。
2行目:次の1stにfpdc、次の2stにdc、最後の2stまで*を繰り返し、次の1stにfpdc、chの上にdc、ターン
3行目:最初のchをdc、次の1stにdc、ターン
3行目:最初のchをdc、次の2stをdc、ターン。 次の1stにdc、次の2stにfpdc、最後の2stまで*を繰り返し、次の1stにdc、chの上にdc、ターン
2行目と3行目を繰り返す
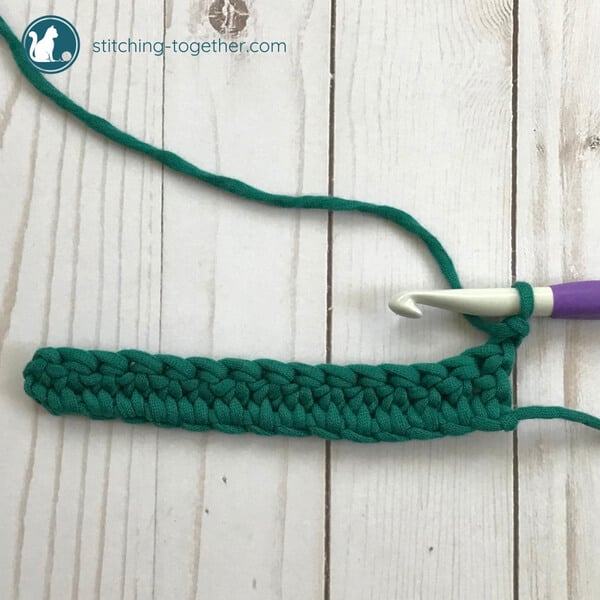
ワッフルステッチの編み方 – 右利きの写真チュートリアル
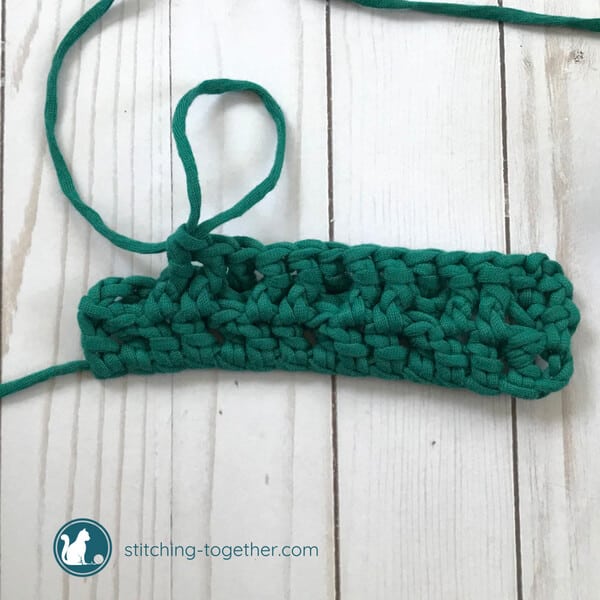
最初に、3+2の倍数のチェーンをします。 針から4番目の鎖を二重かぎ針編みし、横の各ステッチに二重かぎ針編みをし、回します。 (ch multiple of 3 +2; dc in 4th ch from hook, dc in each st across, turn) **3本のチェーンが最初の行の始まりに使われ、最初のダブルクロッシェとしてカウントされます。 私は17本のチェーンから始めたので、1列目は15針になりました。

2 列目を開始するのにチェーンを2つ使います-1目としてカウントされます。 (ch 2, counts as 1st st)
次のステッチのポストあたりでフロントポスト2本かぎ針を前から挿入しスタートさせます。 (fpdc in next st)
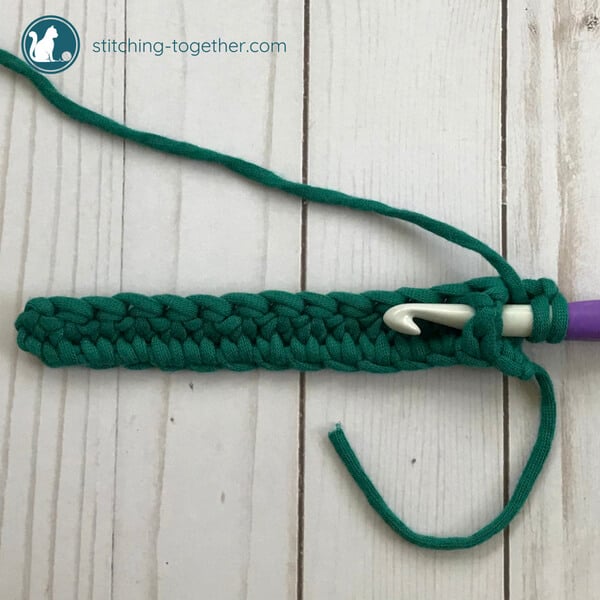
次の2ステッチでダブルクロシェを編む。 (dc in the next 2 sts)
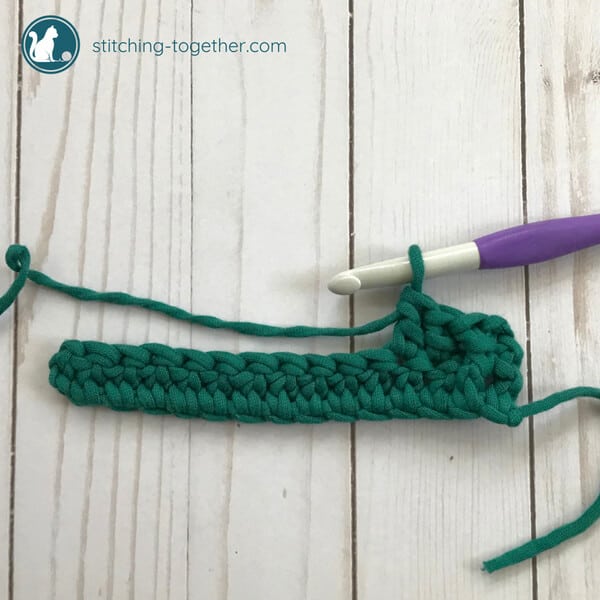
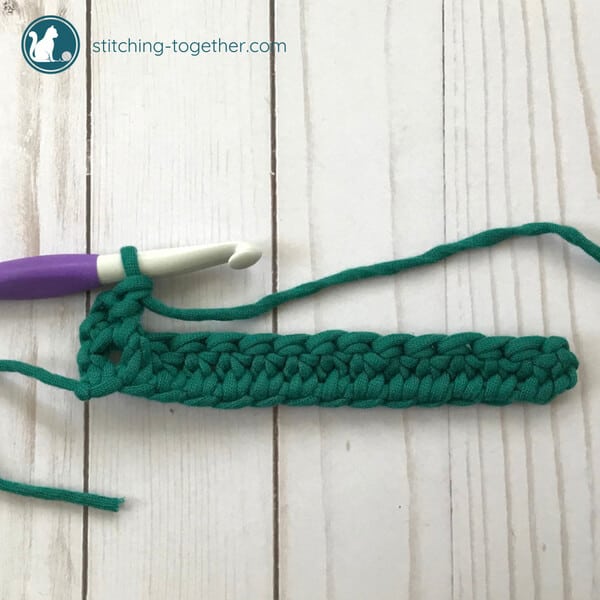
Continue, repeating steps 3-5, until reaching the last 2 stitches of the row.
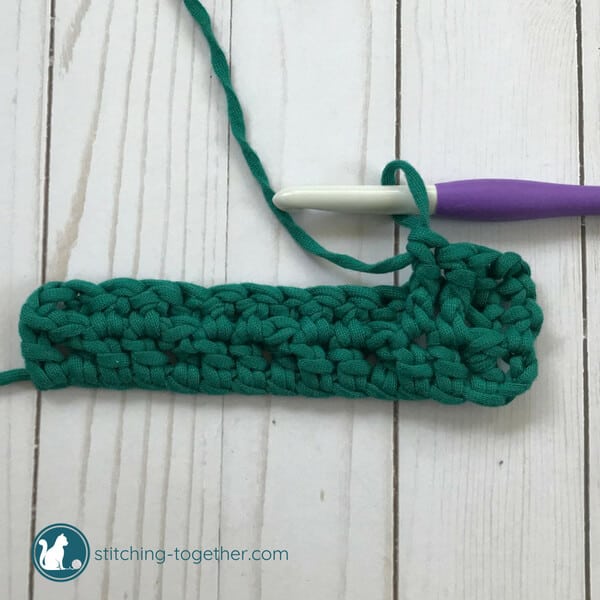
Front post double crochet in the next stitch followed by a double crochet in the top of the ch, turn. (fpdc, dc in top of ch, turn).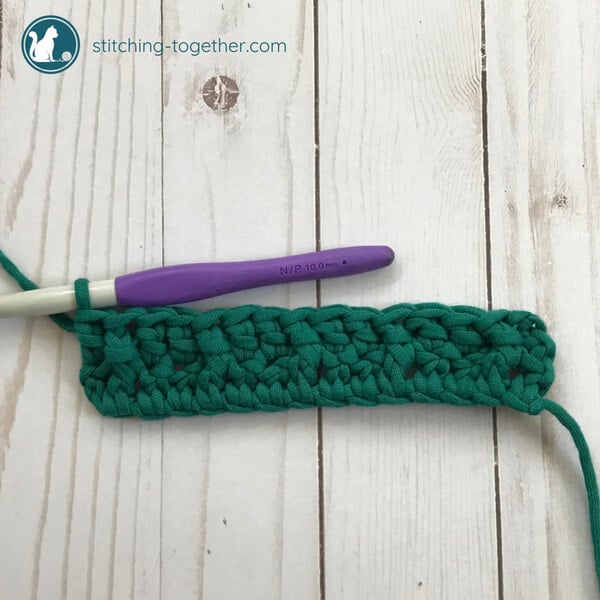
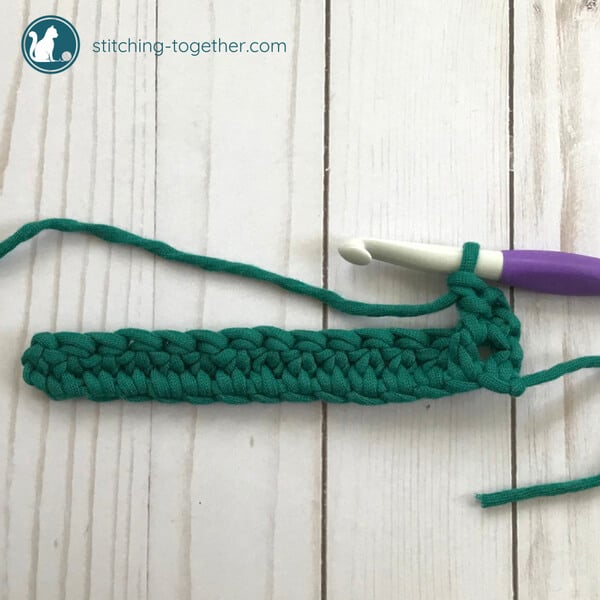
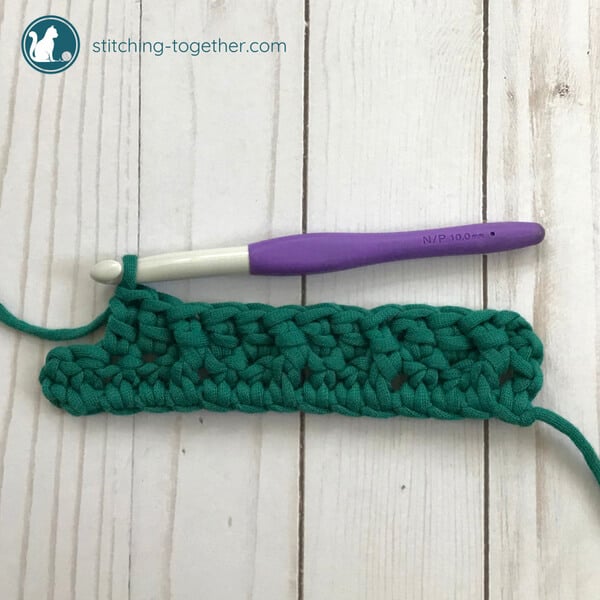
Chain 2 to start the 3rd row (counts as first stitch). (ch 2, counts as 1st st). 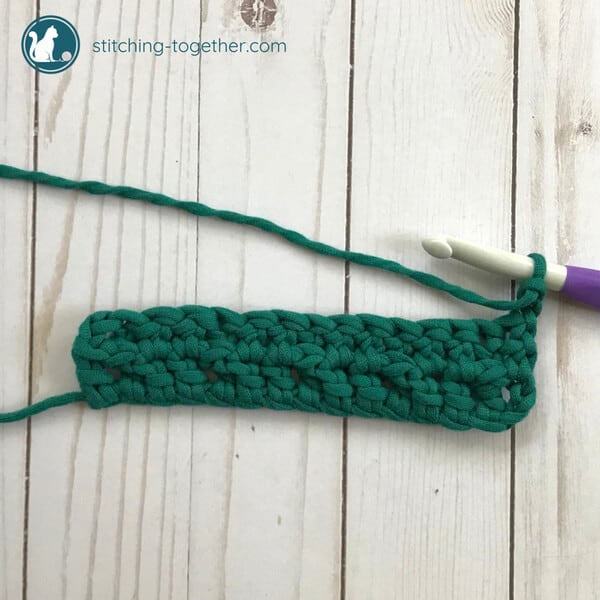
Double crochet in the next stitch. (dc in next st) Don’t forget that the chain 2 counts as your first stitch so you do not double crochet in the stitch immediately below.
Front post double crochet around the next two stitches. (fpdc around the next two sts)
Continue repeating steps 8 and 9 until the last two stitches of the row.
Double crochet in the next stitch and double crochet in the top of the ch, turn. (dc in next st, dc top of ch, turn.)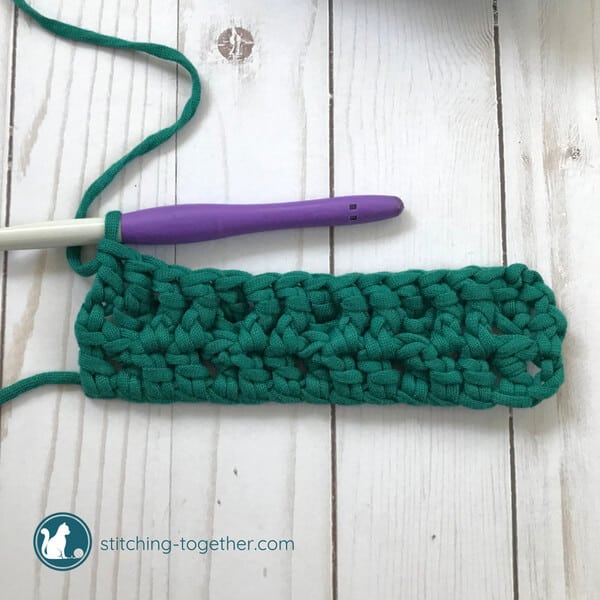
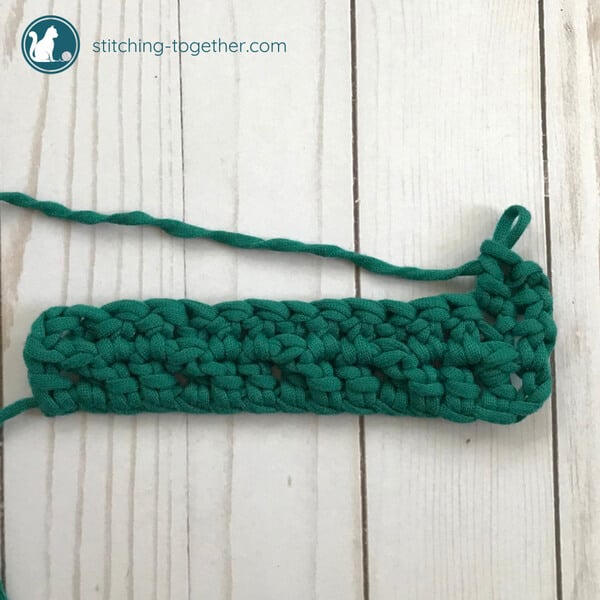
作品をめくると3行目が終わった時点で既に小さな箱ができていますね。 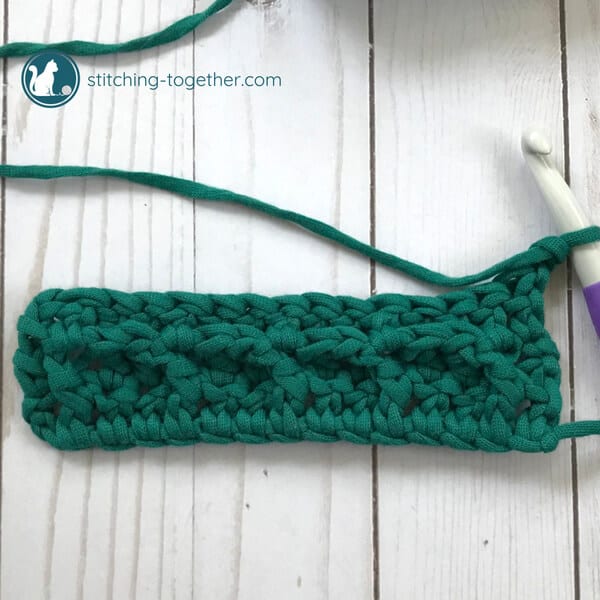
引き続き、2行目と3行目を繰り返してください。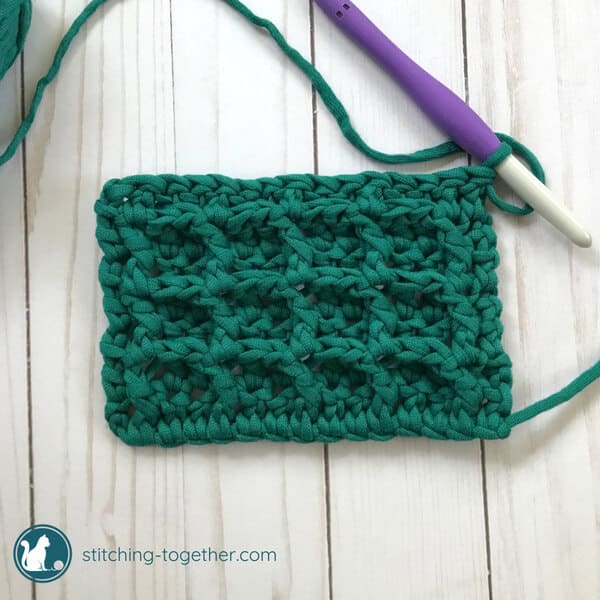
Waffle Stitch Tutorial – Left Handed Step by Step
始めに3+2の倍数の鎖をつけます。 針から4番目の鎖を二重かぎ針編みし、横の各ステッチに二重かぎ針編みをし、ターンします。 (ch multiple of 3 + 2; dc in 4th ch from hook, dc in each st across, turn)
**最初の行の開始には3つのチェーンを使用し、最初のダブルクロッシェとして数えます。 私は17のチェーンから始め、最初の行は15針になりました。 ファンデーションDCから始める場合は、1列目は3の倍数を使用します。 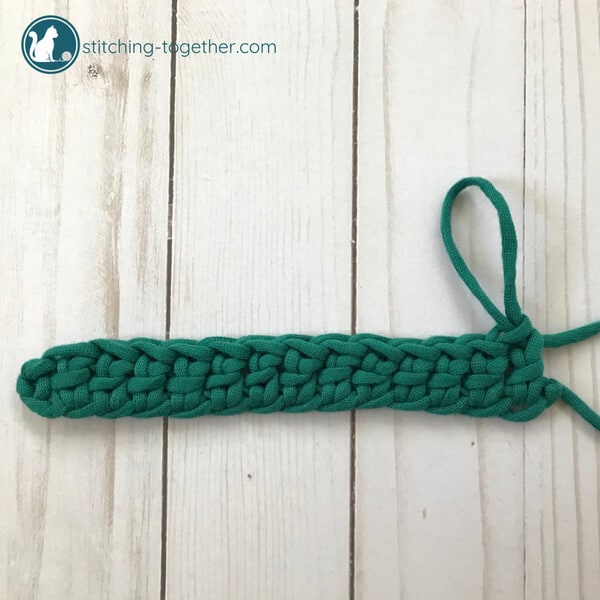
行2の開始をチェーン2 – 最初のステッチとしてカウントされます。 (ch 2, counts as 1st st)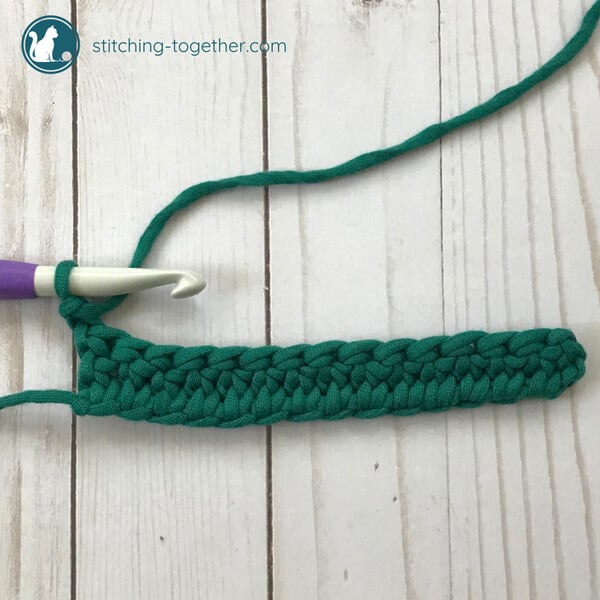
次のステッチのポストあたりを前から針を入れてフロントポスト二重かぎ針編み開始します。 (fpdc in next st)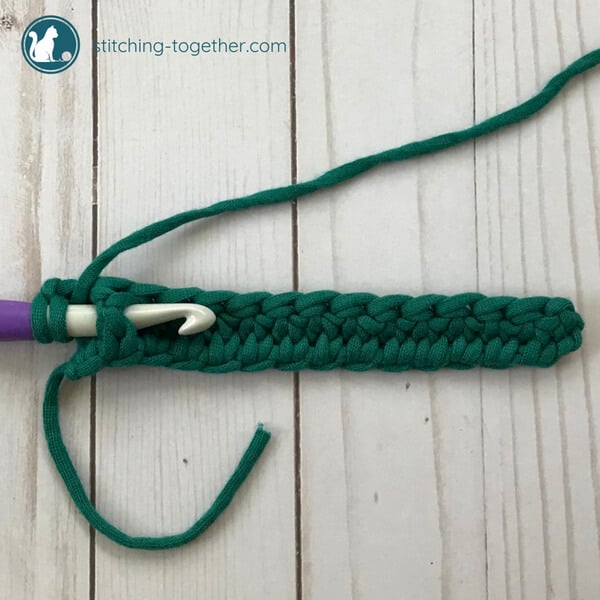
次の2ステッチでダブルクロシェを編んでください。 (dc in the next 2 sts)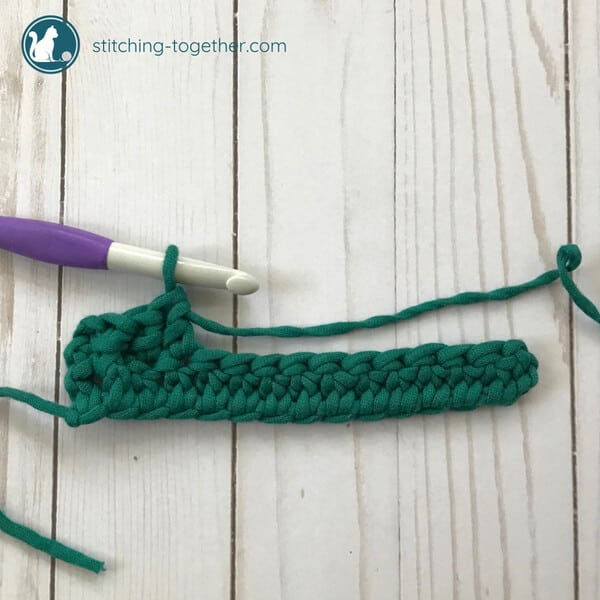
Continue, repeating steps 3-5, until reaching the last 2 stitches of the row.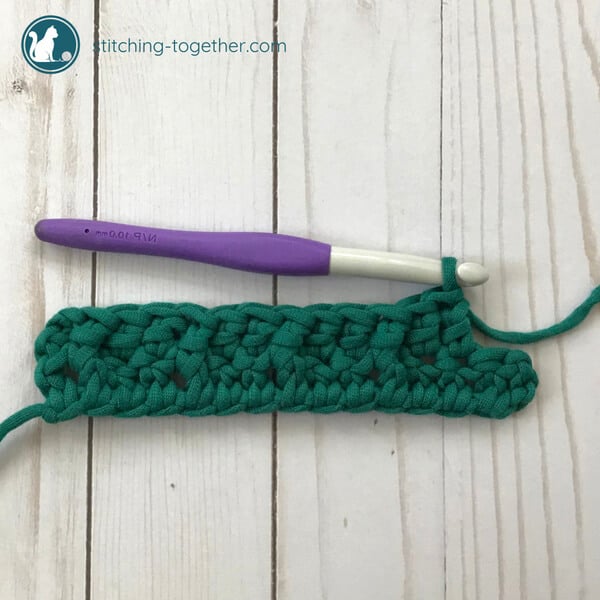
Front post double crochet in the next stitch followed by a double crochet in the top of the ch, turn. (fpdc, dc in top of ch, turn).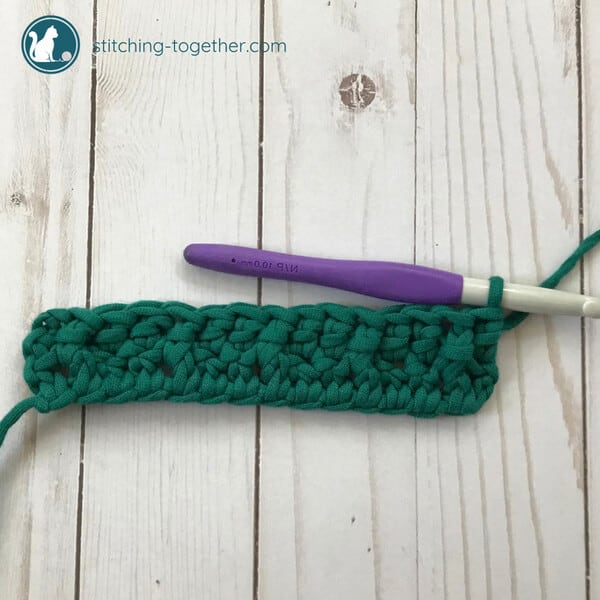
Chain 2 to start the 3rd row (counts as first stitch). (ch 2, counts as 1st st). 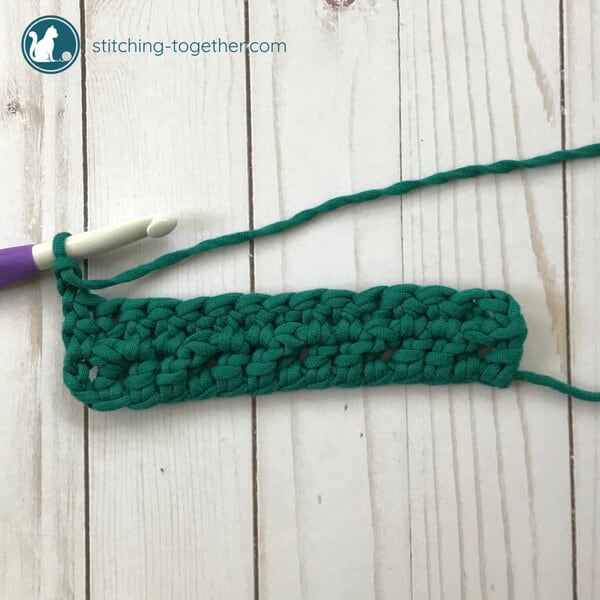
Double crochet in the next stitch. (dc in next st) チェーン2が最初のステッチとしてカウントされるので、すぐ下のステッチでダブルクロッシェをしないことを忘れないでください。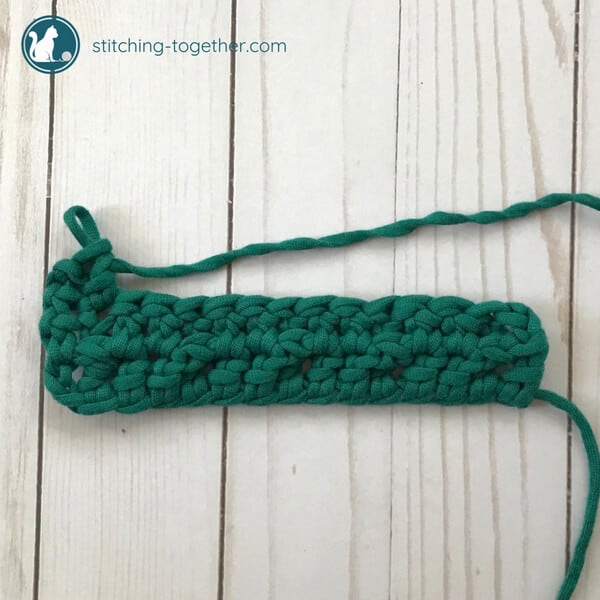
フロントポスト ダブル クロッシェは次の2ステッチ周辺にあることを確認します。 (fpdc around the next two stitches)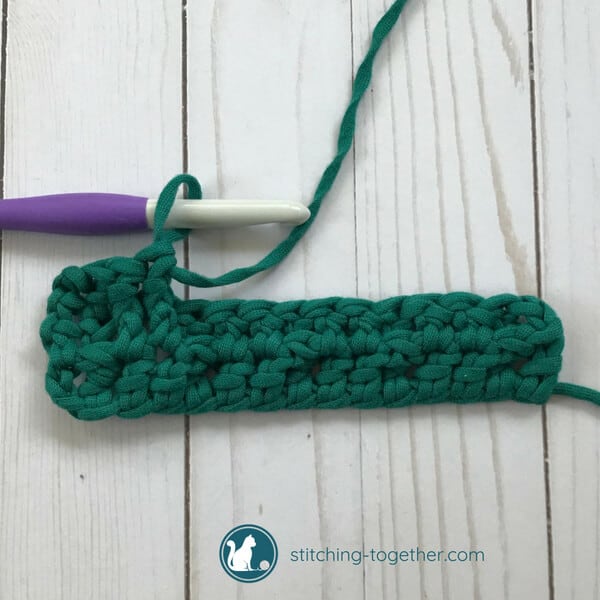
8、9を最後の2針まで繰り返し、1段目を終えるまで続ける。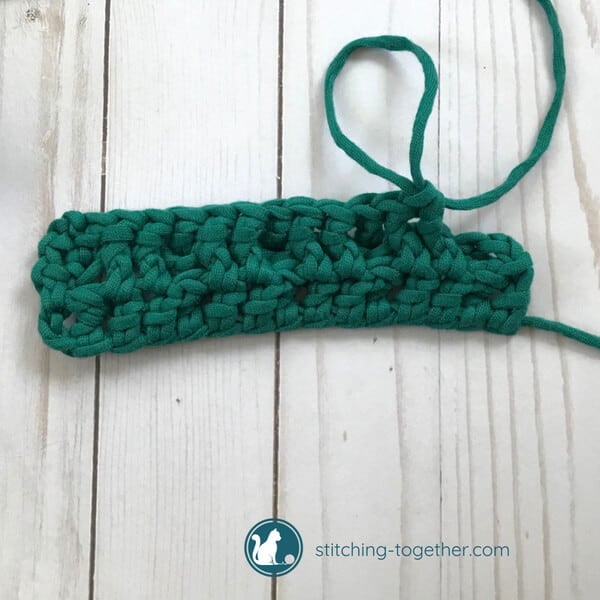
次のステッチでダブルクロシェとダブルクロシェをchの上にして、ターンします。 (dc in next st, dc top of ch, turn.)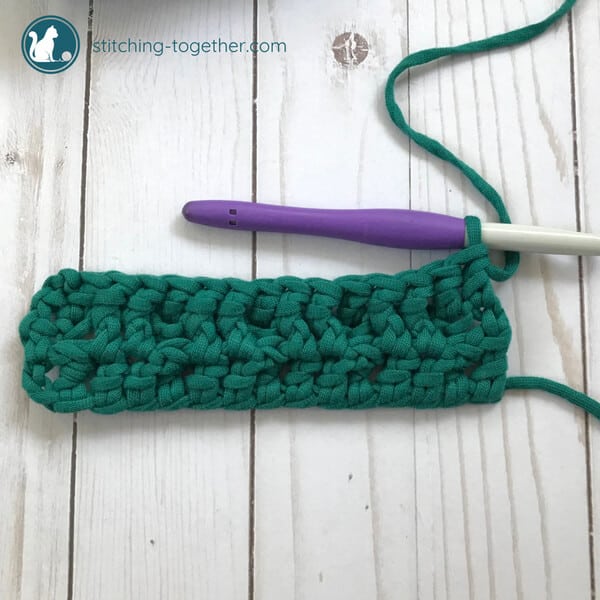
作業を振り返ると、3行目が終わった時点で既に小さなボックスができていますね。 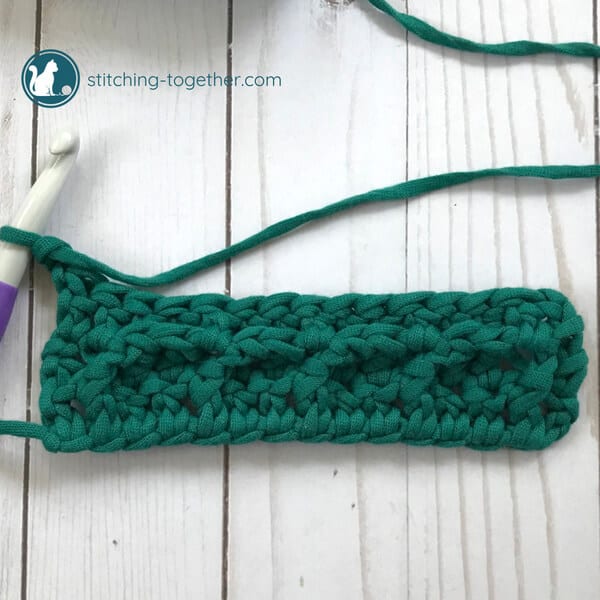
続けて2行目と3行目を繰り返してください。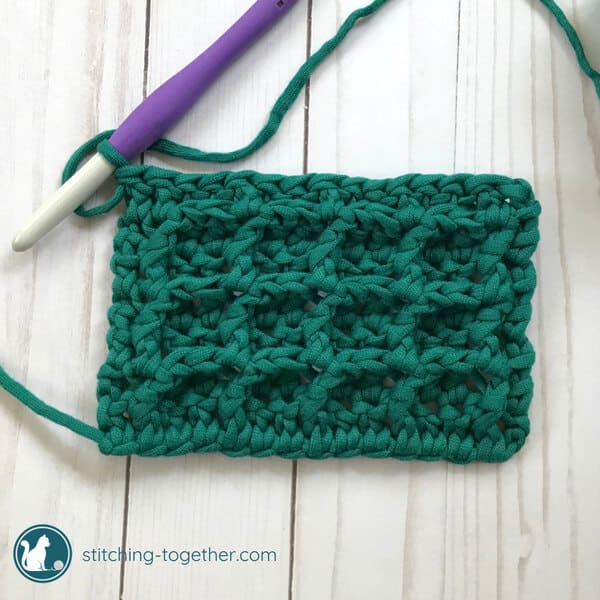
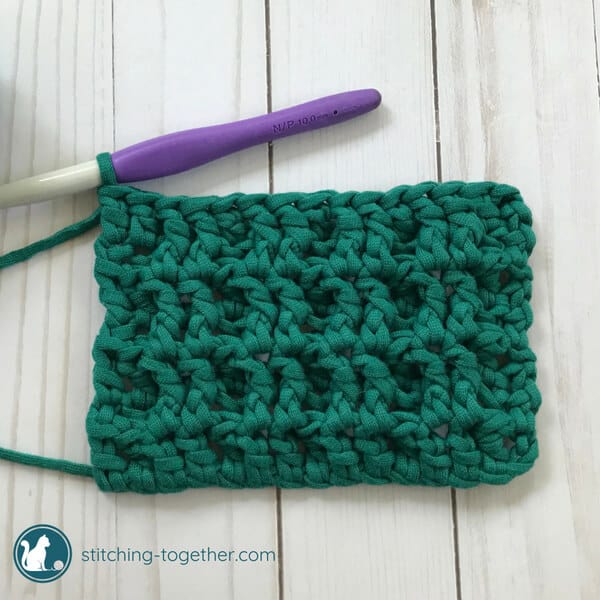
ステップバイステップの写真チュートリアル
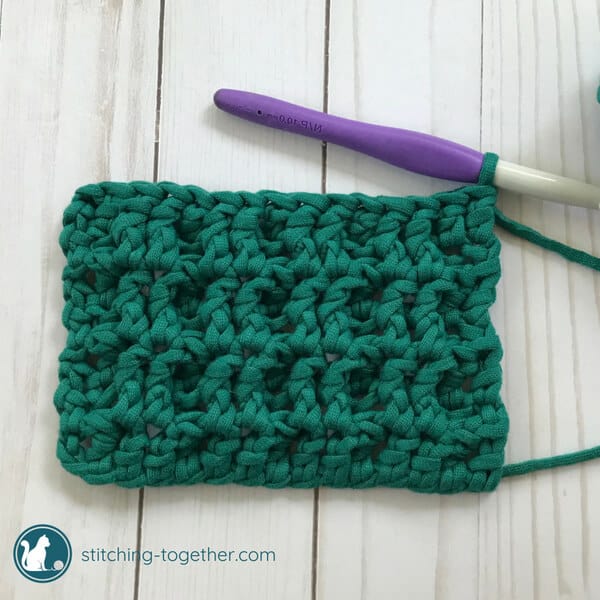
よし!これで完成だ!
チュートリアルのために使用した糸。 Red Heart Strata which has been discontinued but can still be found on AMAZON! and my favorite Clover Amour Crochet hooks size N/P 10.0 mm.
August 23, 2018 | 8 Comments
-
What kind and size of yarn do you use for circle bag?
-
Hi Elva,
You can find all the details for the circle bag right here: https://www.stitching-together.com/cities-circle-bag-crochet-along/
-
-
This waffle stitch has always been my very favorite stitch!!! i love the way dishcloths and baby blankets look and feel fluffed up!! Thx for this dishcloth pattern i like the bigger size!! Following your work for sure!!
-
It’s so fun, isn’t it? I love all of the gorgeous texture it makes.
-
-
Ummm What type of yarn and size of hook? I’m really tired – long week but I simply cannot see that info! Thank you! This stitch is rather nice looking!
-
Hi Linda, I added the info! Thanks for asking!
-
-
Hi Jessica. I am always impressed when a tutorial includes instructions for both right and left handers. I’ve included your crochet waffle stitch tutorial in our latest Top 10 in Craft roundup. https://craftylikegranny.com/fall-craft-ideas Cheers Jodie 🙂
-
Thanks so much Jodie!
-