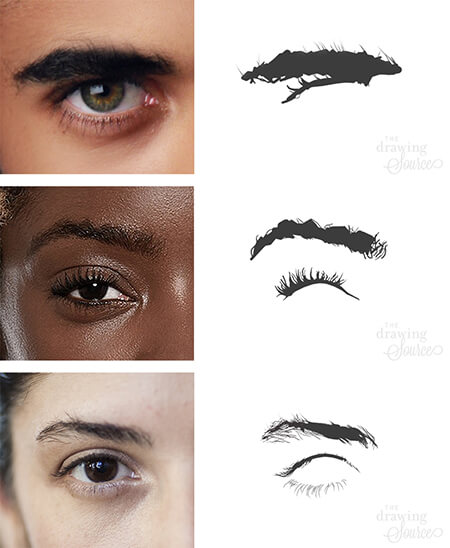
眉は形や大きさで大きな違いがあります。
眉毛を描く「コツ」は、眉毛、あるいは髪の毛と考えるのをやめることです(実際には、どんな難しいテクスチャでも)。 その代わりに、少なくとも描画プロセスの前半では、眉毛を単に形と値として考える必要があります。 これはとても重要なことですが、時には難しいことでもあります。
このレッスンの後には、以下の関連ページもお見逃しなく。
眉を描くプロセスを三つのポイントに集約するとすれば、それは次のようになります。 このような場合、”li “は “li “であり、”li “は “li “である。 最初は眉毛を1つか2つの基本的な形に単純化し、グループ化し、徐々に個々の毛のような具体的な詳細に取り組んでいくのです。 基本的な形と比率が決まったら、似たような眉毛をより具体的にグループ化したものを探し始める。 どこに重なりがあるか?
統一と多様(または類似と相違)のバランスは、構図の基礎の1つであり、この眉を描くときにそれを大いに利用することができます
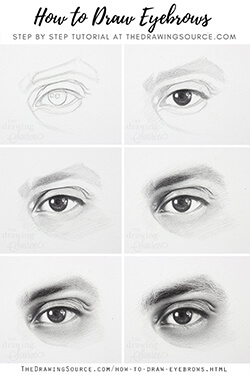
早速チュートリアルに入り、これらのガイドラインを広げてみましょう! このチュートリアルを始める前に、まず最初に、この眉の構成についてよく理解してください。
さっそくチュートリアルに飛び込んで、これらのガイドラインを広げていきましょう!または、私が描いている目の参考写真、このチュートリアルのインフォグラフィック(下記)をダウンロードして、私と一緒に描きましょう!
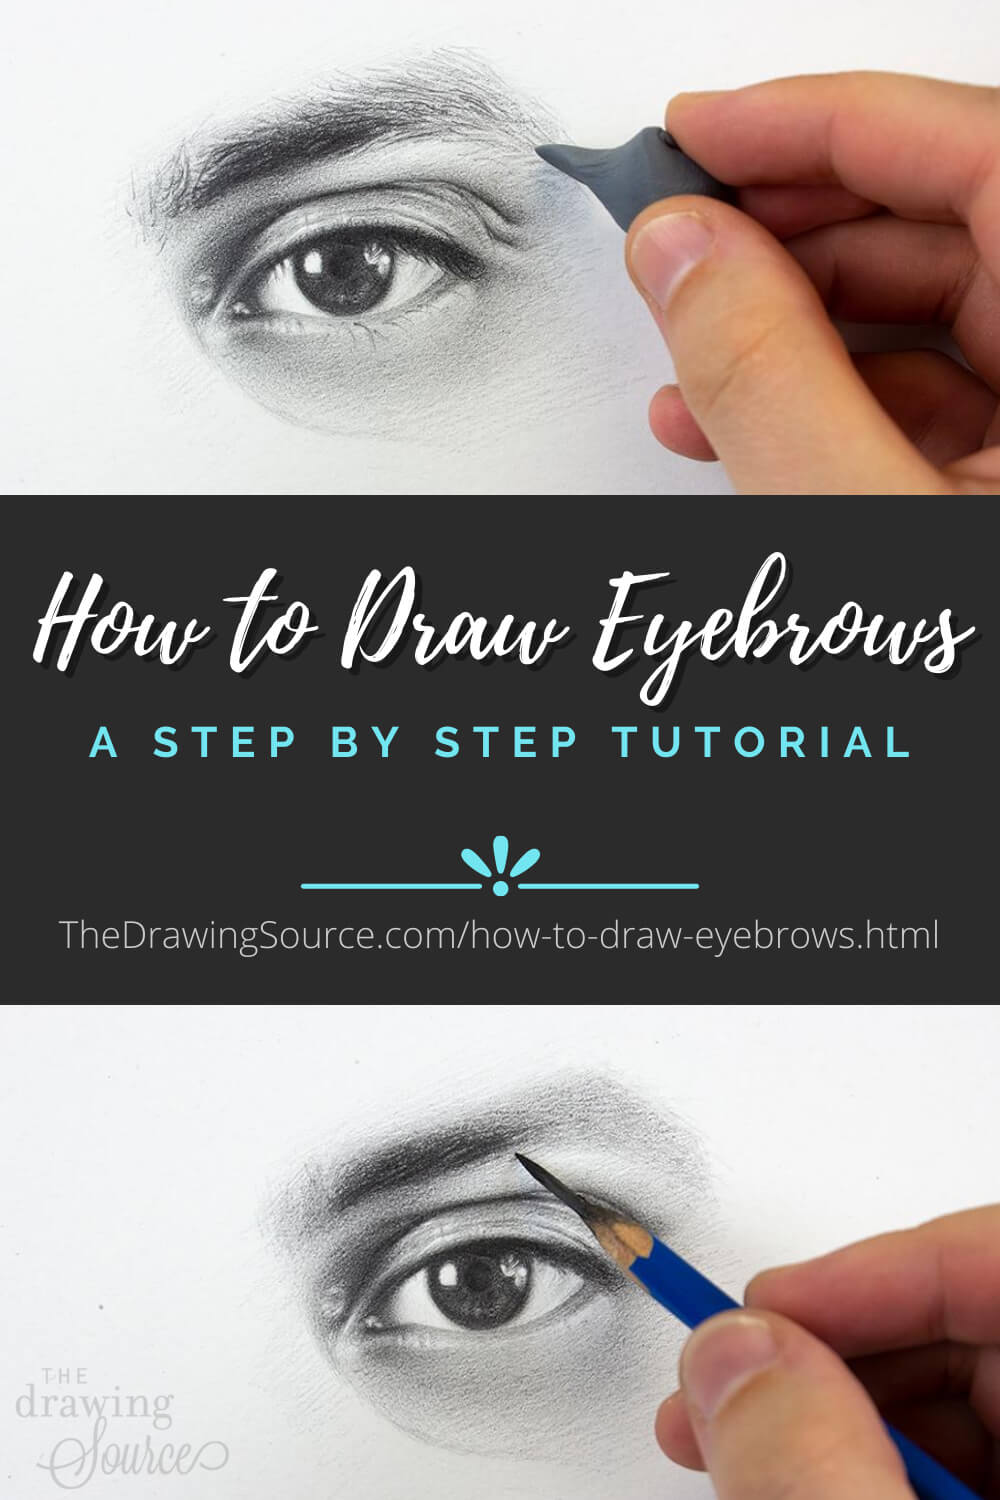
ステッドラーのマースルモグラフグラファイトペンシルを使用する予定です。
ダウンロードできるリソース
私が描く目の参考写真はこちらで入手できます!
眉のチュートリアルインフォグラフィックはこちらです!
Free Video Course on Essential Drawing Concepts
このレッスン全体を通して私は必須描画コンセプトと描画プロセスのステージに言及しています。
How to Draw EyebrowsStep 1:
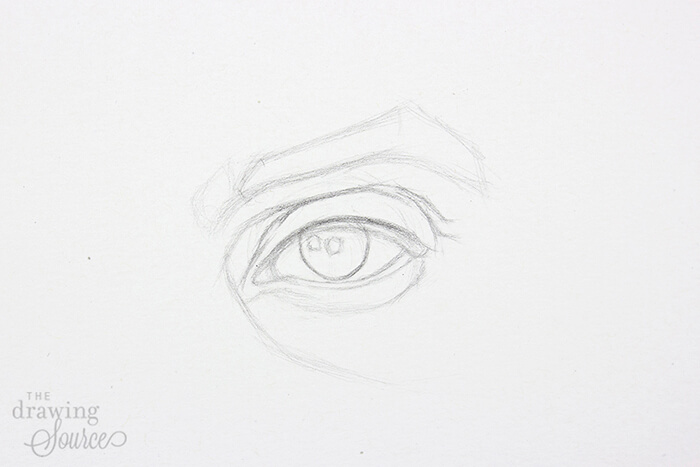
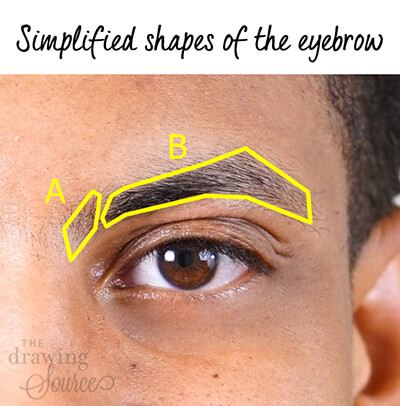
ほとんどのデッサンと同様に、私はこの絵を、線を使って眉毛の基本、単純な形またはいくつかの形をブロック化することから始めるのです。 その結果、多くの細部が融合し、より明確で強固な形ができあがります。 また、シェイプAとシェイプBの間のような主要な分割を探し、それをマイラインドローイングで示します。
During this block-in stage, my priorities are:
- finding and indicating the major angle changes of the eyebrow
- drawing the correct proportions of the eyebrow, and
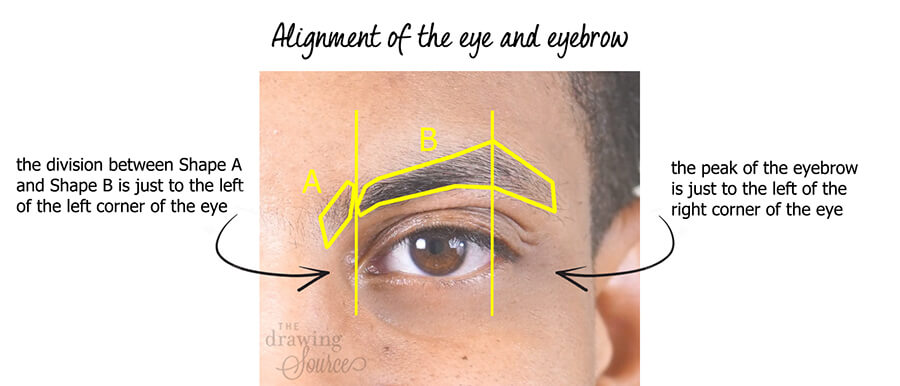
- establishing the correct alignment of the eyebrow with the eye itself.
I can do this by lining up my pencil with the peak of theeyebrow, for example, and checking which part of the eye it aligns with (see the diagram below). Then,I mimic this alignment in my drawing.
How to Draw EyebrowsStep 2
Though I will focus primarily on drawing the eyebrow in this tutorial,because the eye and eyebrow are developed simultaneously, the two areinextricably linked, and I will mention some of the eye-drawing stepswhen they pertain to the eyebrow.
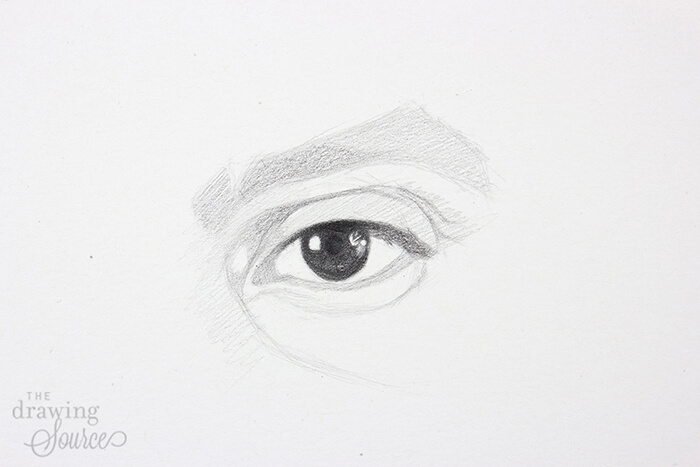
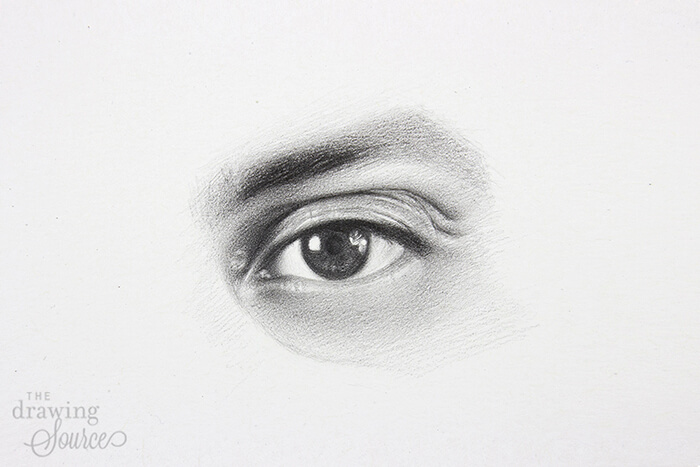
このステップでは、目と眉の価値構造(明るい価値、中間の価値、暗い価値はどこにあるのか)を探し始めています。 (
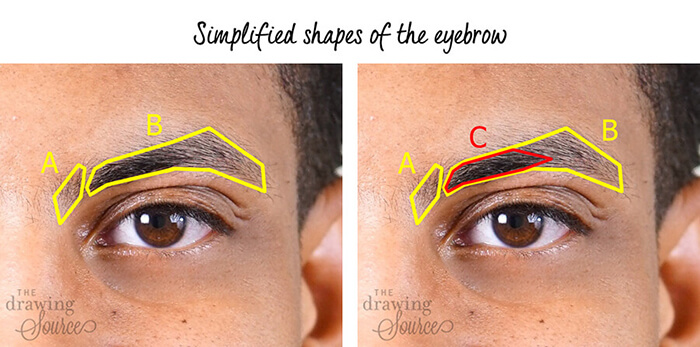
特に眉毛には、形状 B の中に暗い形状があり、これを形状 C と呼ぶことにします (下の写真)。 この図形は、シーン全体の中で最も暗い部分の1つです。 図面では、C型を少し暗めの値で表示しています。 暗い値は消すのが難しい(時には消せない)ので、完全に暗くする前に、すべてが正しい位置にあることを確認したいのです。
眉の描き方ステップ 3
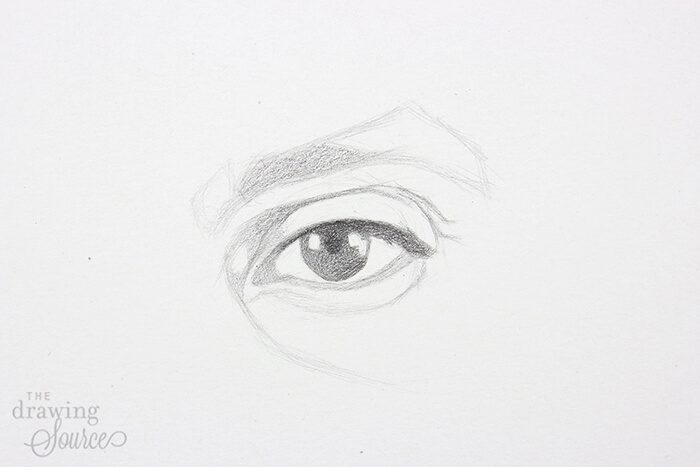
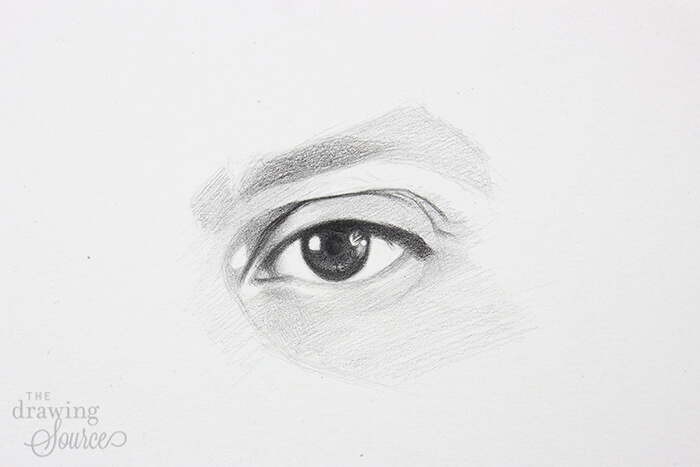
残りの眉を明るい値で埋めて、濃い形と薄い形の間に少し値の差を残しています。
まだ「髪」を描くことに全く関心がないことに注意してください!
リアルな眉を描くコツは、毛の一本一本を描くことにとらわれないことです。
目の瞳孔と虹彩は完全には完成していませんが、レンダリングに集中することで、自信と確信の持てる変数ができ、残りのプロポーション、値、および配置を比較することができます。
How to Draw EyebrowsStep 4
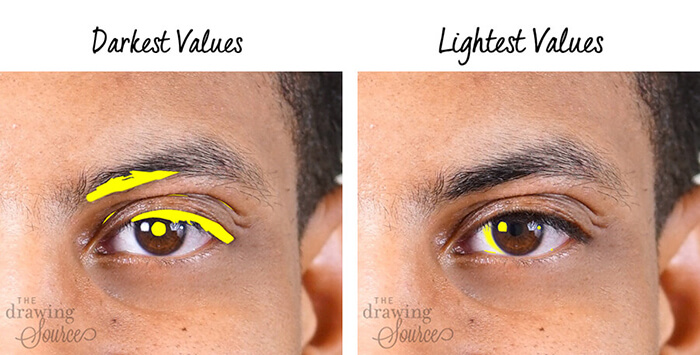
Here I’m beginning to establish the ‘value extremes’ in mydrawing: the lightest and darkest values in the scene (pictured below).
How to Draw EyebrowsStep 5
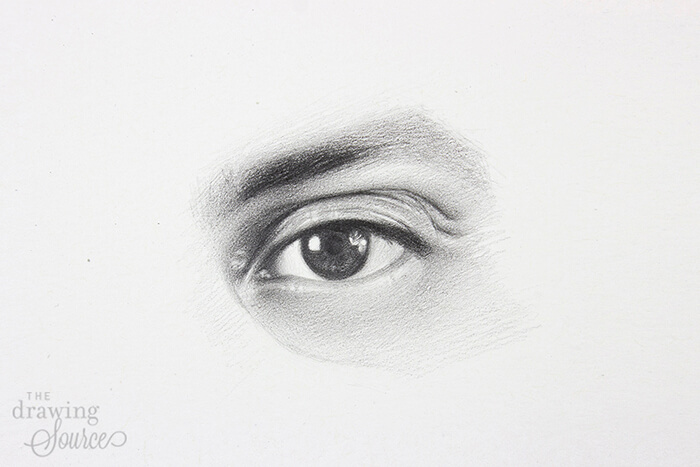
Notice that the eyebrow is already starting to resemblehair even though I haven’t drawn any individual hairs! Here I’ve darkened the eyebrow, particularly thedark shape that I named ‘shape C’ earlier. The subtle pencil marks I applied are alreadystarting to ‘read’ as hair, simply because I applied them in the direction of the hair.
How to Draw EyebrowsStep 6
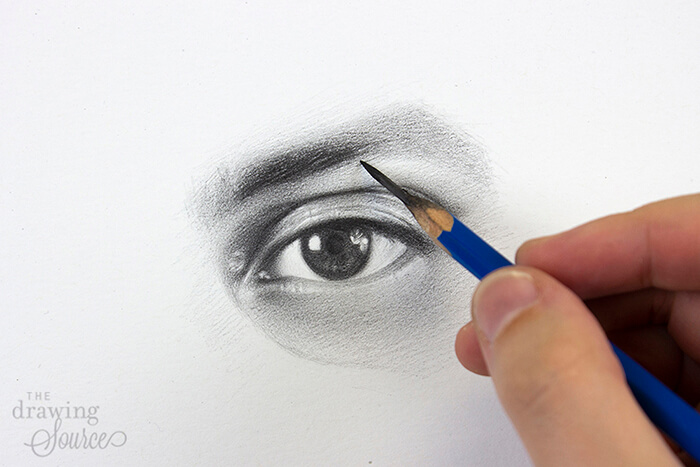
眉毛の濃い形をさらに濃くして明確にし、目の小さな形、例えば上まぶたのひだや、下まぶたのわずかなグラデーションも「回し始め」ているところです。
眉毛のエッジがまだかなり柔らかいことに注目してください。 (エッジの本質的な概念について学ぶには、無料のミニコースのレッスン6をご覧ください。)
眉毛をできるだけ多く描き込み、目の中間値の範囲を構築したので、ようやく眉毛の個々の毛に目を向ける準備ができました。 いいえ、そんなことはありません。 個人的には、超リアルな表現には興味がないのです。 Iprefer a more naturalistic look, and can achieve this by selectively choosingwhich eyebrow hairs to indicate.
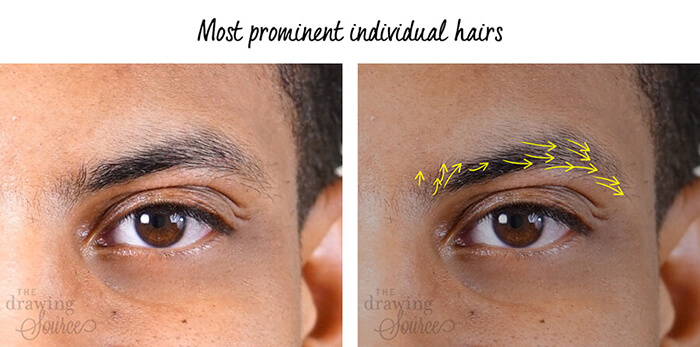
To make my decision, I look for:
- Changes in the direction of the eyebrow hair, and wherethese changes of direction are most noticeable

- Which hairs are most prominent? (Many of the arrows below are similar to the ones above because the most prominent hairs show the changes in direction most evidently!)
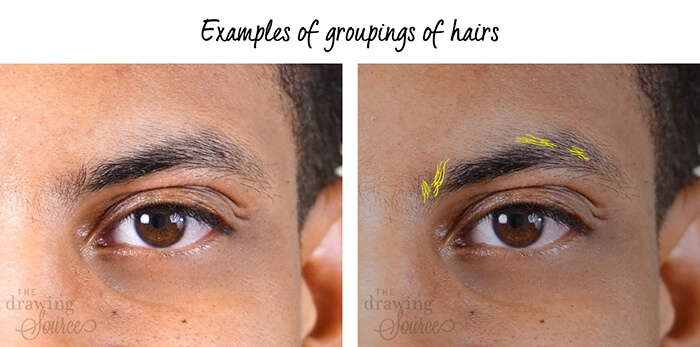
- Groupings of hairs that I can indicate (they can be ‘grouped’ based on their proximity to each other, or by their similar direction)
How to Draw EyebrowsStep 7
Once my analysis is complete, 毛の間隔、太さ、長さに注意しながら、一本一本描き込んでいきます。 毛の間隔、太さ、長さ、どれをとっても均等ではありません。 このように、眉毛の形や太さ、長さなど、ひとつひとつを丁寧に描き込んでいくことが、似せるためのコツなのです。 このように、いくつかのマークが同じ長さや間隔になり始めたら、私はモデルや参考写真をもっとよく見るべき時だと思います。
How to Draw EyebrowsStep 8
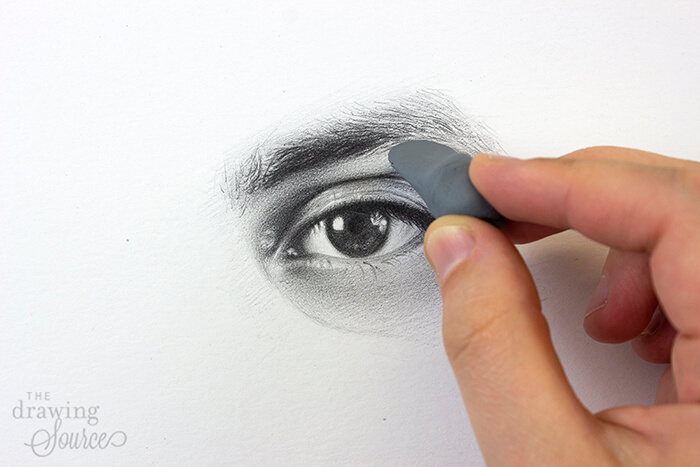
このステップではペンシルと練り消しをほぼ同じように使っています。 特に、練り消しゴムテクニックのビデオで実演している 2 番目のテクニックに大きく依存しています。練り消しゴムを平らにして鋭いエッジを与え、それを使って、参考写真で見られるような毛の間の軽い分離をいくつか作成します。
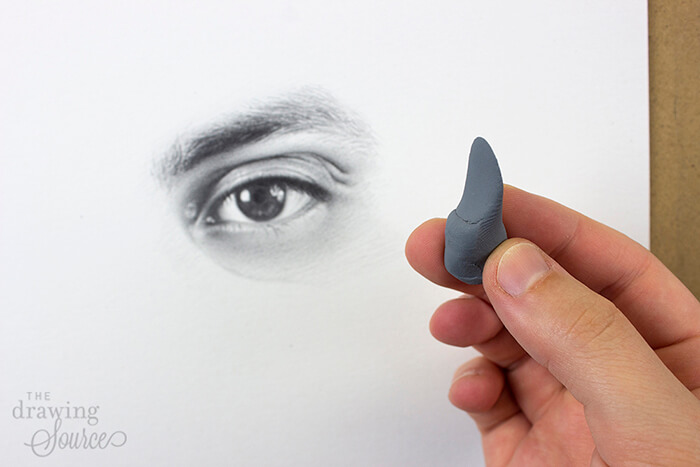 平らにした状態です。 練り消しの鋭いエッジ
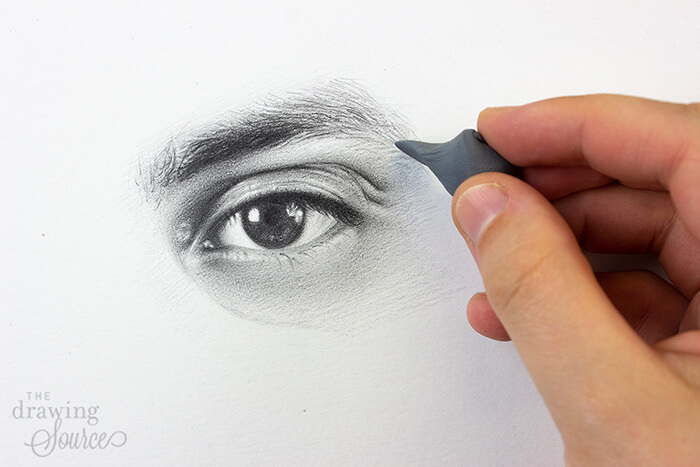
完成した図面
div
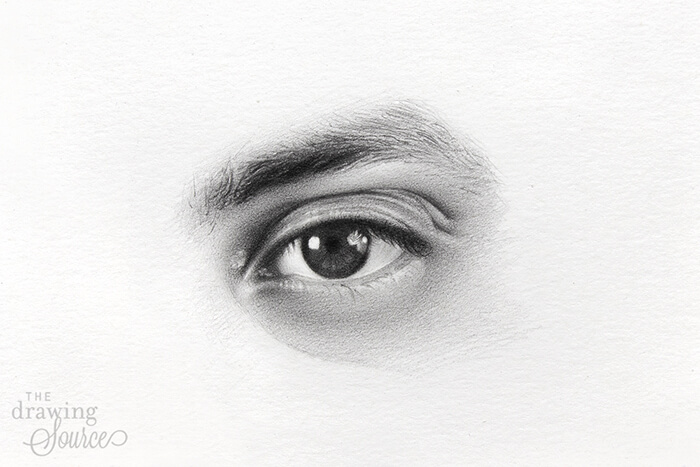
私の描いた絵はモデルの目と眉毛を正確に再現しているでしょうか。 きっとそうではないでしょう! しかし、この人の眉毛の特徴に似ている、それが目標だったのです!
注目点:
- すべての乱れた毛は、非現実的に均等に、同じ方向に向けて描くのではなく、絵に活力と命を与えるために指示したものです。 このようなバリエーションがあると、絵に面白みやリアルさが加わります。
- 眉毛の上の隆起に沿った鋭いエッジがないこと。 When drawing any kind of hair, squint at the subject to determine where the sharpest and softest edges are in order to create a realistic illusion! (Learn about Edges in Lesson 6 of my free Mini-Course).
Downloadable Resources
What next?
Why not download the reference photo of this eye, an infographic of this tutorial to remind you of the steps, and draw it yourself!
Or, check out my step by step Eye Drawing Tutorial, and my guide to the 6 Most Common Eye Drawing Mistakes (and how to avoid them!)
Happy Drawing,

Enjoyed this page? Please share it!
Share buttons and pinnable image below:
If you enjoyed this tutorial on how to draw eyebrows, you may also enjoy …
Related Pages:
How to Draw Realistic Eyes (Step by Step)
6 Most Common Eye Drawing Mistakes (and how to avoid them!)
How to Draw Hair (Step by Step)
How to Draw an Ear (Step by Step)
3 Ways to Use a Kneaded Eraser
Return to Portrait Drawing from How to Draw Eyebrows
Return to Drawing Tutorials from How to Draw Eyebrows